


Changing brakes is a crucial aspect of vehicle maintenance that ensures the safety and performance of your car. Brakes are vital components that require regular upkeep to function correctly. Over time, brake pads and rotors wear down and need replacement to maintain optimal braking performance.
Understanding how to change brakes is a valuable skill for both experienced mechanics and DIY enthusiasts, potentially saving time and money. This article will cover safety gear, essential and specialized tools, tool usage tips, common mistakes to avoid, and a final checklist for changing brakes. Safety should be the primary concern when changing brakes.
Before beginning any brake maintenance, it is essential to have the proper safety equipment. This includes protective eyewear, gloves, and clothing that covers arms and legs. Brake dust and debris can be harmful if inhaled or if they come into contact with skin, making protective gear crucial.
Additionally, working on a vehicle can be physically demanding, so wearing comfortable and supportive footwear is important to prevent accidents or injuries. Prioritizing safety and wearing appropriate gear minimizes the risk of accidents and ensures a smooth and safe brake changing process.
Key Takeaways
- Changing brakes is an essential maintenance task for any vehicle owner to ensure safety and optimal performance.
- Safety gear such as gloves, eye protection, and a face mask should always be worn when changing brakes to protect against harmful chemicals and debris.
- Basic tools for changing brakes include a lug wrench, jack, jack stands, and a C-clamp for compressing the brake caliper.
- Specialized tools such as a brake piston tool, brake bleeder kit, and a torque wrench may be necessary for certain brake systems.
- When using tools to change brakes, always follow the manufacturer’s instructions and torque specifications to ensure proper installation and performance.
Safety Gear for Changing Brakes
Protective Gear Essentials
Safety gear includes protective eyewear, gloves, and clothing that covers your arms and legs. This is because brake dust and debris can be harmful if inhaled or come into contact with your skin.
Footwear Matters
Working on a vehicle can be physically demanding, so wearing comfortable and supportive footwear is also important to prevent accidents or injuries.
Minimizing Risk
By prioritizing safety and wearing the appropriate gear, you can minimize the risk of accidents and ensure a smooth and safe brake changing process.
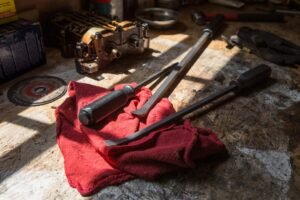
Basic Tools for Changing Brakes

Changing brakes requires a set of basic tools that are essential for the job. The most basic tools needed for changing brakes include a lug wrench or tire iron, a jack, jack stands, a C-clamp, a hammer, and a flathead screwdriver. The lug wrench or tire iron is used to loosen the lug nuts on the wheels, allowing you to remove the wheels from the vehicle.
A jack and jack stands are necessary for lifting the vehicle off the ground safely and securely. The C-clamp is used to compress the caliper piston when replacing brake pads, while the hammer and flathead screwdriver are used for removing stubborn brake components. These basic tools are essential for changing brakes and should be part of any DIY mechanic’s toolkit.
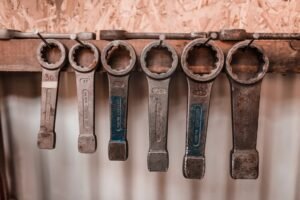
When it comes to changing brakes, having the right tools for the job is essential for a successful brake maintenance process. In addition to the basic tools mentioned earlier, there are specialized tools that can make the brake changing process easier and more efficient. These specialized tools include a brake caliper tool, a brake bleeder kit, a brake piston retractor tool, and a brake rotor micrometer.
The brake caliper tool is used to retract the caliper piston when replacing brake pads, while the brake bleeder kit is used to remove air from the brake system after changing brake fluid. The brake piston retractor tool is designed to retract brake pistons on vehicles with rear disc brakes, while the brake rotor micrometer is used to measure the thickness of brake rotors to determine if they need to be replaced. These specialized tools are designed to make specific tasks easier and more precise when changing brakes.
Specialized Tools for Changing Brakes
| Tool Name | Function | Usage |
|---|---|---|
| Brake Caliper Tool | Compresses the caliper piston when changing brake pads | Used to retract the caliper piston to make room for new brake pads |
| Brake Bleeder Kit | Removes air from the brake system | Used to bleed the brake lines after changing brake fluid or replacing brake components |
| Brake Piston Wind Back Tool | Rewinds the brake piston into the caliper | Essential for retracting the brake piston when replacing brake pads or rotors |
| Brake Drum Tool | Removes and installs brake drums | Used to remove and install brake drums for vehicles with drum brakes |
When it comes to changing brakes, having the right tools for the job is essential for a successful brake maintenance process. In addition to the basic tools mentioned earlier, there are specialized tools that can make the brake changing process easier and more efficient. These specialized tools include a brake caliper tool, a brake bleeder kit, a brake piston retractor tool, and a brake rotor micrometer.
The brake caliper tool is used to retract the caliper piston when replacing brake pads, while the brake bleeder kit is used to remove air from the brake system after changing brake fluid. The brake piston retractor tool is designed to retract brake pistons on vehicles with rear disc brakes, while the brake rotor micrometer is used to measure the thickness of brake rotors to determine if they need to be replaced. These specialized tools are designed to make specific tasks easier and more precise when changing brakes.
Tips for Using Tools to Change Brakes
When using tools to change brakes, there are several tips that can help make the process smoother and more efficient. First, it is important to use the correct size and type of tools for each task. Using the wrong tool can lead to damage or improper installation of brake components.
Additionally, keeping your tools organized and in good condition can save time and prevent frustration during the brake changing process. It is also important to follow manufacturer recommendations and specifications when using specialized tools such as a brake rotor micrometer or a brake piston retractor tool. Lastly, taking your time and being patient when using tools can help prevent mistakes and ensure that the job is done correctly.
Common Mistakes to Avoid When Changing Brakes

Proper Torquing of Lug Nuts
One common mistake is not properly torquing lug nuts after reinstalling wheels. Failing to torque lug nuts to the manufacturer’s specifications can lead to loose wheels and potential accidents while driving.
Lubrication of Brake Components
Another common mistake is not properly lubricating brake components during reassembly. Proper lubrication of caliper slide pins and other moving parts is essential for smooth braking performance and preventing premature wear of brake components.
Bleeding the Brake System
Additionally, failing to properly bleed the brake system after changing brake fluid can lead to spongy or ineffective brakes. By avoiding these common mistakes and following proper procedures when changing brakes, you can ensure that your vehicle’s braking system functions properly and safely.
Conclusion and Final Checklist for Changing Brakes
In conclusion, changing brakes is an essential part of vehicle maintenance that ensures safety and optimal performance on the road. Prioritizing safety by wearing appropriate gear, using basic and specialized tools correctly, following tips for using tools effectively, and avoiding common mistakes are all crucial aspects of successful brake maintenance. Before starting any maintenance work on your vehicle’s braking system, it is important to have a final checklist in place to ensure that all necessary steps are taken for a smooth and safe process.
The final checklist for changing brakes should include:
1. Ensure you have all necessary safety gear including protective eyewear, gloves, and appropriate clothing.
2. Gather all basic tools such as a lug wrench or tire iron, jack stands, C-clamp, hammer, and flathead screwdriver.
3.
Check if any specialized tools such as a brake caliper tool or a brake bleeder kit are needed for your specific vehicle.
4. Follow manufacturer recommendations and specifications when using specialized tools.
5. Take your time when using tools and follow proper procedures for each task.
6.
Avoid common mistakes such as not torquing lug nuts properly or failing to lubricate brake components during reassembly.
By following this final checklist and ensuring that all necessary steps are taken when changing brakes, you can maintain a safe and reliable braking system in your vehicle for years to come.
If you’re looking to change your brakes, you’ll need the right tools for the job. Check out this article for tips on the essential tools needed to change your brakes and ensure your safety on the road.
FAQs
What tools are needed to change brakes?
The tools needed to change brakes typically include a lug wrench, a jack, jack stands, a C-clamp, a brake caliper tool, a socket set, a ratchet, a torque wrench, and brake cleaner.
Why do I need a lug wrench?
A lug wrench is needed to loosen and remove the lug nuts that hold the wheel in place.
What is the purpose of a jack and jack stands?
A jack is used to lift the vehicle off the ground, while jack stands are used to support the vehicle at the appropriate height for working on the brakes.
Why do I need a C-clamp?
A C-clamp is used to compress the brake caliper piston back into its housing in order to make room for the new brake pads.
What is a brake caliper tool used for?
A brake caliper tool is used to retract the caliper piston and to rotate the piston back into the caliper housing on vehicles with rear disc brakes.
Why do I need a socket set and ratchet?
A socket set and ratchet are used to remove and install the various bolts and fasteners that hold the brake components in place.
What is the purpose of a torque wrench?
A torque wrench is used to tighten the lug nuts and other fasteners to the manufacturer’s specified torque settings to ensure proper installation and safety.
Why do I need brake cleaner?
Brake cleaner is used to clean the brake components and remove any dirt, grease, or brake dust that may have accumulated, ensuring proper brake function.


+ There are no comments
Add yours